
(The monograms on mine messed up when I emailed them to my mom so she could print them, oh well!)

They're personalized, and can be easily altered to look however you want them too! As an example, I'm going to create a binder cover for my Geometry, Honors Biology, and French II binder (I combine three subjects into one 1.5 inch binder to save space in my backpack, since most of our work is done online anyway).
1. Open up Microsoft Word on your computer (Note: This tutorial is being done on a PC, and unfortunately I'm not sure how differently things are set up on Macs. However, all you Mac-users should be able to figure it out on your own, I believe in you!).
2. Select the "Shapes" button, and draw a large rectangle. Change the "Shape Fill" and "Shape Outline" to whatever you want- I chose pink.

3. Create a second rectangle inside the first.
4. In the "Shape Fill" button, select the same color you used for the first rectangle.
5. In the "Shape Outline" button, select a second color of your choice- I chose white.
6. Also in the "Shape Outline" button, mouse over the button labeled "Weight", and select "3 pt."

7. Repeat steps 2-6 towards the bottom of the page, but make it considerably smaller. Alter the colors to your liking- I chose green.

8. Now, go back up to the top rectangle and draw a text box.
9. Alter the "Shape Fill" and "Shape Outline" to match the background color.

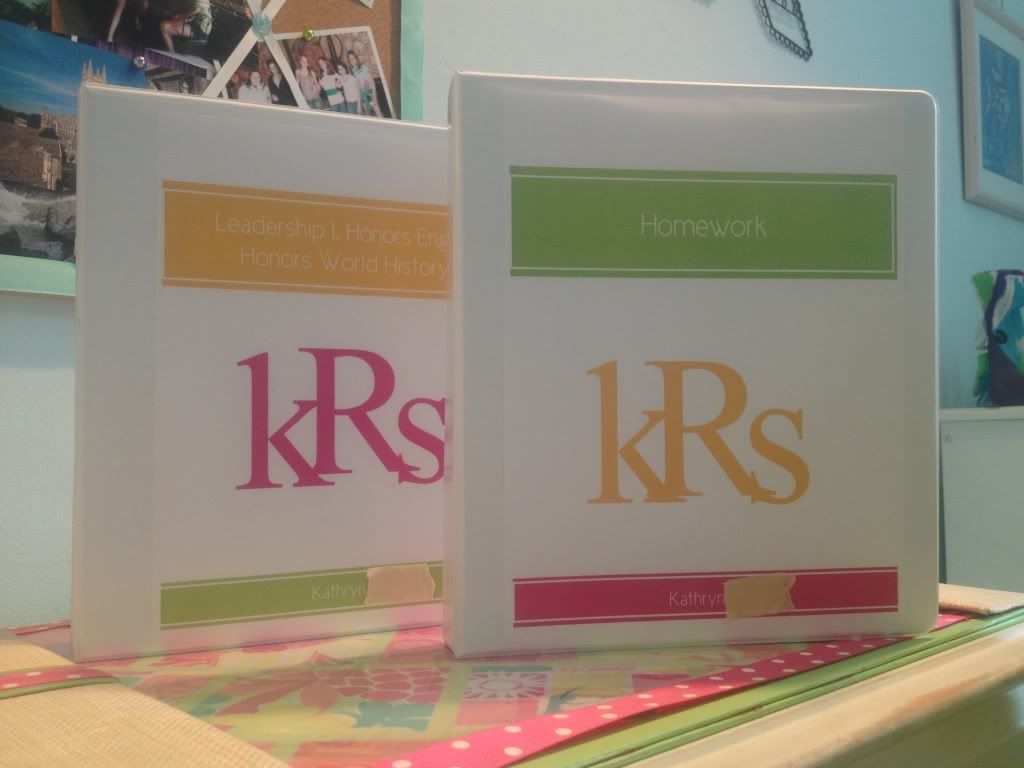
10. Using any font you like (I used Cicle Gordita, off FontSquirrel), Type the name of your binder inside the circle. Make sure it's big enough to be read easily (I used size 42), and centered.

11. Repeat steps 8 and 9 with the smaller rectangle towards the bottom of the page.
12. Using the same font you used for the title, type your first and last name.

13. You're almost done! Now find a monogram font that you like (I used Monogram KK Font, off dafont.com).
14. In the middle of the page, draw a large text box. Using a size 300 font, press "Shift" and type your last initial. Change the color to whatever you would like- I chose orange

15. Create a second text box to the left and slightly above your last initial, and type your first initial in size 300, but without pressing "Shift" (it will still be uppercase, but will be smaller and the perfect size for your monogram!) Change the color to match your last initial
16. Repeat step 15 on the right side, and using your middle initial.
And there you have it! No more scribbling "English" across your binder in Sharpie. You now have a way to create cute, personalized covers for all of your binders!
Thank you so much for posting this! Very Helpful!
ReplyDelete